
Give new life to your old denim! If you've got a pair of jeans gathering dust in the back of your closet, don't toss them – transform them into a unique and incredibly practical messenger or cross-body bag. This project is not only eco-friendly but also results in a sturdy, stylish bag perfect for everyday essentials, a small notebook, and more. Plus, we'll make use of those classic denim pockets for instant organization!
Let's get ready to stitch up some denim magic!
Skill Level: Intermediate Beginner to Intermediate (familiarity with sewing straight lines, zippers, and working with heavier fabrics is helpful)

Materials You'll Need:
1 pair of adult-sized jeans (straight leg or relaxed fit works best for fabric yield)
Coordinating all-purpose thread (or denim-specific thread for topstitching)
Sewing machine with a denim needle (essential for piercing thick denim!)
Fabric scissors
Pins or fabric clips
Measuring tape or ruler
Fabric marker or chalk
Iron and ironing board
Optional: 9-inch (23 cm) zipper (for inner pocket)
Optional: Magnetic snap closure or hook-and-loop tape (for flap closure)
Optional: D-rings and swivel hooks (if you want an adjustable, detachable strap)
Optional: Interfacing (medium-weight fusible, for added structure if desired)
Finished Bag Dimensions (Approximate): Height: 9-10 inches (23-25 cm) Width: 8-9 inches (20-23 cm) Depth: 2-3 inches (5-7.5 cm)
Preparation: Deconstructing Your Jeans
Wash and Dry: Wash and dry your jeans. This preshrinks the fabric and ensures it's clean before you start.
Cut Off Legs: Lay the jeans flat and smooth. Cut off both legs of the jeans, straight across, about 1 inch (2.5 cm) below the crotch seam. Set the top portion (waistband, fly, and pockets) aside – we'll use a back pocket!
Open Leg Seams: Cut along the inner seam of both jean legs, opening them up into flat pieces of fabric. Press them flat with an iron.
Harvest Pockets: Carefully unpick one of the back pockets from the top portion of the jeans. Try to keep it intact as much as possible. This will be your exterior pocket on the bag flap.

Cutting Your Bag Pieces:
All seam allowances are 3/8 inch (1 cm) unless otherwise stated.
From the flat denim leg pieces, cut the following:
Main Body (2 pieces): Cut two rectangles measuring 11 inches (28 cm) high x 9 inches (23 cm) wide.
Side/Bottom Panel (1 piece): Cut one long rectangle measuring 34 inches (86 cm) long x 3.5 inches (9 cm) wide. (Adjust length if your bag body pieces are slightly different. It needs to go around the entire bottom and sides).
Flap (1 piece): Cut one rectangle measuring 8 inches (20 cm) high x 9 inches (23 cm) wide.
Strap (1 piece): Cut one long rectangle measuring 48-55 inches (122-140 cm) long x 3 inches (7.5 cm) wide. (Adjust length based on desired cross-body or shoulder length).
Lining Fabric (Optional, but recommended for neatness and durability):
Main Body Lining (2 pieces): Same as Main Body: 11 inches (28 cm) high x 9 inches (23 cm) wide.
Side/Bottom Panel Lining (1 piece): Same as Side/Bottom Panel: 34 inches (86 cm) long x 3.5 inches (9 cm) wide.
Flap Lining (1 piece): Same as Flap: 8 inches (20 cm) high x 9 inches (23 cm) wide.
Inner Pocket Pieces (Optional, for zippered pocket):
Pocket Panel (2 pieces): 7 inches (18 cm) high x 9 inches (23 cm) wide.
Sewing Instructions:

Step 1: Prepare the Bag Flap
Take your denim Flap piece. Decide which side will be the exterior.
Center your harvested back pocket onto the exterior of the Flap, about 1 inch (2.5 cm) up from what will be the bottom edge of the flap. Pin in place.
Topstitch around the three sides of the pocket (leaving the top open) to secure it to the flap. Use a denim needle and a slightly longer stitch length for a professional look.
(Optional: If adding a magnetic snap, attach the female (top) part of the snap now, centered on the flap, about 1 inch (2.5 cm) from the bottom edge of the flap.)
Step 2: Assemble the Bag Body
Take one Main Body piece and your Side/Bottom Panel.
Starting at the bottom center of one Main Body piece, pin the Side/Bottom Panel all around the three sides (bottom and two sides), matching raw edges. Ease around the corners to create a smooth curve or gentle angle.
Sew slowly with a 3/8 inch (1 cm) seam allowance. Clip the curves as needed.
Repeat with the second Main Body piece, attaching the other long edge of the Side/Bottom Panel to it. You now have a 3D bag "box."
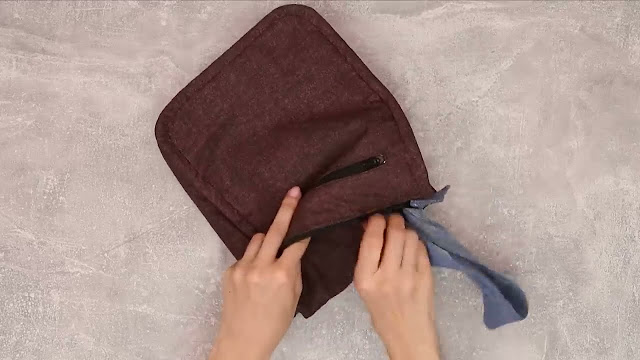
Step 3: Add the Inner Zipper Pocket (Optional)
Take one of your Main Body Lining pieces.
Follow a standard zipper pocket tutorial to create a recessed zipper pocket on this lining piece using your two Inner Pocket pieces and the 9-inch zipper. This will give you a secure internal pocket. * (Search "zipper pocket lining tutorial" if you're new to this!) *
Step 4: Construct the Bag Lining
Repeat Step 2 using your Lining Fabric pieces to create a 3D lining bag "box."
Do NOT attach the flap lining yet.
Step 5: Attach the Strap
Take your Strap piece. Fold it in half lengthwise, right sides together. Press.
Sew along the long raw edge with a 3/8 inch (1 cm) seam.
Turn the strap right side out (a loop turner or safety pin helps!). Press flat, making sure the seam is centered along the back.
Topstitch along both long edges of the strap for durability and a finished look.
Position the ends of the strap onto the top raw edge of the Main Bag Body (denim), about 1 inch (2.5 cm) in from the side seams. Pin securely. Baste in place within the seam allowance.
(If using D-rings and swivel hooks for an adjustable strap: Create two small denim loops from scrap denim. Insert a D-ring into each loop, fold, and baste these loops onto the top raw edge of the main bag body at the side seams.)
Step 6: Attach the Flap to the Main Bag Body
With the main denim bag body right side out, lay it flat.
Position the prepared denim Flap (with pocket) onto the back panel of the main bag body, centering it along the top raw edge. The right side of the flap should be facing the right side of the bag body. Pin in place.
Baste the flap to the bag body within the seam allowance.
Step 7: Assemble Bag and Lining
With the main denim bag body still right side out, insert it into the lining bag (which should be wrong side out). The right sides of the denim bag and the lining should be facing each other.
Align the top raw edges of the bag and lining, matching side seams and strap placement. Pin all around the top opening.
Sew all around the top raw edge with a 3/8 inch (1 cm) seam allowance, leaving a 4-5 inch (10-12.5 cm) opening along the back edge (near where the flap is attached) for turning.
Step 8: Finish the Flap
Take your Flap Lining piece. Place it right sides together with the main denim Flap (which is now basted to the bag body).
Pin around the three unsewn edges of the flap (the two sides and the bottom curve/edge).
Sew with a 3/8 inch (1 cm) seam allowance. Clip corners and curves.
Turn the flap right side out through the turning hole in the bag opening. Push out corners neatly. Press.
Topstitch around the finished edges of the flap for a crisp look.
Step 9: Final Assembly & Finishing Touches
Reach into the turning hole in the bag opening and gently pull the entire bag right side out.
Push out all corners and edges. Press the top edge of the bag.
Stitch the turning hole closed by hand using a ladder stitch, or by machine with a topstitch very close to the edge.
(Optional: If adding a magnetic snap or hook-and-loop tape closure to the bag opening, attach the male (bottom) part of the magnetic snap to the front main body of the bag, aligning it with the female part on the flap. Or attach hook-and-loop tape in strips.)
Give your entire bag a final press.
You're Done!
You've just transformed a pair of old jeans into a fantastic, one-of-a-kind messenger bag! It's durable, practical, and incredibly stylish. Fill it with your essentials and show off your upcycling prowess.
Share your denim bag creations with me on social media using #UpcycledDenimBag – I'd love to see how you've customized yours! Happy sewing!

No comments:
Post a Comment