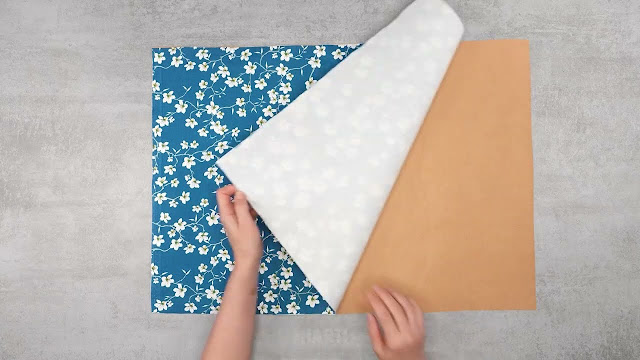
Looking for a sewing project that's both fun to make and super functional? This structured boxy zipper bag is a fantastic choice! With its neat rectangular shape, secure top zipper, and comfortable handles, it's perfect for a variety of uses – from carrying cosmetics to organizing craft supplies, or even as a chic small tote. The beautiful blue floral fabric in the image highlights how a lovely print can really make this bag shine!

This tutorial will guide you through creating this charming and durable bag, complete with a full lining for a professional finish.
Why You'll Love This Project:
Practical & Versatile: Great for organization, travel, lunch, or a small everyday carry.
Structured Shape: The boxy design holds its form well, making it easy to pack and access items.
Secure Zipper Closure: Keeps all your contents safe inside.
Customizable: Choose any gorgeous fabric to match your personality.
Rewarding Project: A satisfying sew for those looking to build their bag-making skills with neat corners and lining.

What You'll Need:
Main Fabric: Approximately 1/2 to 3/4 yard (0.5 to 0.7 meters) of medium-weight woven fabric (e.g., cotton canvas, duck cloth, sturdy quilting cotton). The blue floral print in the image is a perfect example!
Lining Fabric: Approximately 1/2 to 3/4 yard (0.5 to 0.7 meters) of lightweight cotton or similar fabric (like the turquoise lining visible).
Webbing for Handles: About 1 yard (1 meter) of 1-inch (2.5 cm) wide cotton or polyester webbing in a coordinating color (like the white in the image).
Zipper: A plastic or metal zipper, 12-16 inches (30-40 cm) long, matching the length of your bag's top opening.
Medium-weight Fusible Interfacing (Highly Recommended): For added structure and durability for all main fabric pieces.
Sewing Machine: With a universal needle and a zipper foot.
Matching Polyester Thread.
Fabric Scissors or Rotary Cutter and Mat.
Measuring Tape or Ruler.
Fabric Chalk or Washable Marker.
Pins or Wonder Clips: Clips are excellent for holding multiple layers and straps.
Iron and Ironing Board.
Optional: Small "Handmade" tag/label.
Step-by-Step Pattern & Sewing Guide:
Step 1: Cut Your Fabric Pieces
This bag consists of several rectangular panels. Let's define the desired finished dimensions of your bag: Length (L), Width (W), Height (H).
Main Front & Back Panels (Cut 2 from Main Fabric, 2 from Lining):
Dimensions:
(L + 1 inch seam allowance)x(H + 1 inch seam allowance)Example: For a bag 10" L x 6" W x 6" H, these would be 11" x 7" rectangles.
Side/End Panels (Cut 2 from Main Fabric, 2 from Lining):
Dimensions:
(W + 1 inch seam allowance)x(H + 1 inch seam allowance)Example: For a bag 10" L x 6" W x 6" H, these would be 7" x 7" rectangles.
Top/Bottom Panels (Cut 2 from Main Fabric, 2 from Lining):
These form the top (where the zipper goes) and the very bottom of the bag.
Dimensions:
(L + 1 inch seam allowance)x(W + 1 inch seam allowance)Example: For a bag 10" L x 6" W x 6" H, these would be 11" x 7" rectangles.
Handle Pieces (Cut 2):
Cut two pieces of webbing, each about 16-20 inches (40-50 cm) long, or your desired handle length.
Step 2: Apply Interfacing & Prepare Handles
Fuse Interfacing: Fuse medium-weight interfacing to the wrong side of all your Main Fabric pieces (Front/Back, Side/End, Top/Bottom Panels). This will give your bag structure.
Attach Handles:
On the right side of each of your Main Front & Back Panels, measure in from the side edges by about 2-3 inches (5-7.5 cm).
Pin one end of a handle webbing piece at these marks, aligning the raw edge of the webbing with the top raw edge of the fabric panel. Make sure the webbing extends towards the center of the panel. Repeat for the other end of the same handle. Ensure the handle is not twisted.
Stitch the handle ends securely in place within the seam allowance (e.g., 1/4 inch from the raw edge). You can use a square or an "X" box stitch for extra reinforcement.
Step 3: Install the Zipper to Top Panels
Take Top/Bottom Panels: Grab your two main fabric Top/Bottom Panels. These will become your actual top (zippered) and bottom (solid) panels.
Prepare Zipper Edges: Along one of the long edges of each panel, fold under the raw edge by 1/4 inch (0.6 cm) towards the wrong side and press.
Attach Zipper: Place your zipper face down along one of these prepared folded edges (right side of fabric). Align the zipper tape edge with the fabric edge. Pin securely.
Stitch: Using your sewing machine's zipper foot, stitch the zipper in place close to the folded edge.
Repeat: Repeat for the other side of the zipper, attaching it to the opposing folded edge of the other Top/Bottom Panel. The zipper should now connect these two panels, forming your zippered top/bottom unit.
Topstitch: Topstitch on either side of the zipper, parallel to the zipper teeth, for a clean and professional finish. This also helps the fabric lay flat.

Step 4: Assemble the Outer Bag
Sew Side Panels to Main Body:
Take one Main Front Panel (with handles) and one Top/Bottom Panel (the one with the zipper). Place them right sides together, aligning one of their long edges. Pin and stitch with a 1/2 inch (1.25 cm) seam allowance. Press seam open.
Repeat for the other Main Back Panel, attaching it to the other long edge of the Top/Bottom Panel. You now have a long strip of fabric that forms the front, top/bottom, and back of your bag.
Attach Side/End Panels:
Take one Side/End Panel. Align one of its edges (right sides together) with the side seam of your main bag body (where the front/back panels meet the top/bottom panel). Pin carefully around the perimeter, matching corners.
This step involves sewing a continuous seam around the entire rectangular opening of your bag. Go slowly around the corners (you can clip the corner seam allowances slightly to help them ease).
Stitch with a 1/2 inch (1.25 cm) seam allowance.
Repeat for the other Side/End Panel on the opposite side of the bag.
Tip: Clip corners and curves after stitching to help seams lay flat. Finish raw edges with a zigzag stitch or serger.
Turn & Check: Turn your outer bag right side out. Use a point turner or a dull pencil to push out the corners to get a nice, crisp boxy shape.

Step 5: Assemble the Lining
Repeat Step 3 & 4 for your lining fabric, except:
Do not attach handles to the lining panels.
Do not install a zipper in the lining's top/bottom panel. Instead, simply sew the two lining top/bottom panels together along one long edge with a 1/2 inch (1.25 cm) seam allowance, leaving a 4-5 inch (10-12.5 cm) opening in the middle of this seam. This opening will be used for turning the bag right side out later.
Step 6: Combine Outer Bag and Lining
Insert Lining: Turn your outer bag right side out. Keep your lining bag inside out.
Nest Bags: Carefully insert the outer bag into the lining bag, so their right sides are facing each other. The handles of the outer bag should be tucked inside.
Align & Pin: Align the entire top raw edge of the outer bag (the opening around the zipper) with the top raw edge of the lining bag. Pin all around the perimeter, matching all seams.
Stitch: Stitch around this entire top opening with a 1/2 inch (1.25 cm) seam allowance.
Turn Right Side Out: Reach into the opening you left in the lining's bottom seam (Step 5.1) and pull the entire bag right side out through this hole.
Close Lining Opening: Hand stitch or machine stitch the opening in the lining's bottom seam closed.
Push Lining In: Gently push the lining into the outer bag. Press the top edge of the bag, ensuring the lining sits neatly inside and the handles are well-defined.
Your Fantastic Structured Boxy Bag!
You've done it! You've sewn a beautiful, organized, and functional boxy zipper bag. This project is perfect for showcasing a beautiful fabric and makes a wonderful handmade accessory or gift.
Share your amazing boxy bag creations with us in the comments or on social media! Happy sewing!

No comments:
Post a Comment