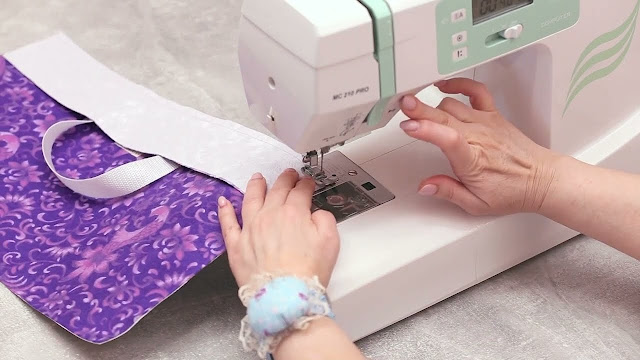
Looking for a sewing project that results in a truly unique and functional bag? This duffle bag, with its distinctive top zipper design, is a fantastic choice! Whether you need a stylish carry-all for the gym, a weekend getaway, or just to organize your craft supplies, this bag offers both charm and practicality. The example in the image uses a beautiful purple patterned fabric, showing off how fabric choice can make all the difference!

This tutorial will guide you through creating this classic barrel-shaped duffle bag, focusing on its clever main body piece that integrates the zipper opening.
Why You'll Love This Project:
Distinctive Design: The main pattern piece creates a unique look, different from traditional duffle bags.
Practical & Spacious: A great size for various uses, offering ample storage.
Customizable: Choose any fabric you love to match your style.
Rewarding Challenge: A good project to practice curved seams, zipper installation, and working with lining.
Handmade Gift Idea: Perfect for friends and family!

What You'll Need:
Main Fabric: Approximately 1 yard (1 meter) of medium-weight woven fabric (e.g., cotton canvas, duck cloth, home decor fabric, or sturdy quilting cotton). The patterned fabric in the image is lovely!
Lining Fabric: Approximately 1 yard (1 meter) of lightweight cotton or similar fabric.
Webbing for Handles: About 1.5 - 2 yards (1.5 - 2 meters) of 1-inch (2.5 cm) wide cotton or polyester webbing.
Zipper: A plastic or metal zipper, ideally 18-24 inches (45-60 cm) long, matching the length of your bag's top opening.
Medium-weight Fusible Interfacing (Optional but recommended): For added structure, especially for the main body and side panels.
Sewing Machine: With a universal needle and a zipper foot.
Matching Polyester Thread.
Fabric Scissors or Rotary Cutter and Mat.
Measuring Tape or Ruler.
Fabric Chalk or Washable Marker.
Pins or Wonder Clips: Clips are great for holding multiple layers.
Iron and Ironing Board.
Optional: Decorative tag/label, D-rings for a detachable shoulder strap.
Step-by-Step Pattern & Sewing Guide:
Step 1: Create Your Pattern Pieces
This bag is primarily made from three main types of pieces:
Main Body Piece (Cut 1 from Main Fabric, 1 from Lining): This is the large rectangular piece with two curved "flaps" extending from the long sides, as shown in the flat layout image. These flaps will form the top of your bag and the zipper opening.
Dimensions (example, adjust for desired size):
Total Length (A): This will be the main length of your bag (e.g., 12-16 inches / 30-40 cm).
Total Width (B): This includes the height of the bag sides plus the width of the two top flaps. A good starting point for a bag about 8-10 inches (20-25 cm) high is
(Bag Height * 2) + Zipper Flap Width * 2(e.g.,(9 * 2) + (2.5 * 2) = 18 + 5 = 23 inchestotal width). The zipper flaps are roughly 2-3 inches (5-7.5 cm) wide.Drawing the Pattern: On a large piece of paper, draw the main rectangular body
(A x B). Then, from each long side, draw out the curved "flaps" that will meet at the top for the zipper. Ensure these curves are symmetrical and meet at the center top. Add 1/2 inch (1.25 cm) seam allowance all around this complex shape.Tip: The main body of the bag will be the central rectangle, and the two long extensions will fold inwards to create the top zippered opening.
Side Panel Pieces (Cut 2 from Main Fabric, 2 from Lining): These are the round or oval pieces that form the ends of your duffle bag.
Dimensions: The diameter of these circles/ovals should match the height of the main body section (before the flaps). (e.g., if your bag height is 9 inches, the diameter is 9 inches).
Drawing the Pattern: Use a plate, compass, or string-and-pencil method to draw a perfect circle/oval. Add 1/2 inch (1.25 cm) seam allowance.
Step 2: Cut Fabric & Apply Interfacing
Cut Pieces: Cut all your pattern pieces from both your main fabric and your lining fabric.
Apply Interfacing (Optional): Fuse medium-weight interfacing to the wrong side of all your main fabric pieces (Main Body and Side Panels) for added structure and durability. Fuse to the handle webbing if desired.
Step 3: Prepare Handles
Cut Webbing: Cut two pieces of webbing, each about 24-28 inches (60-70 cm) long, or your desired handle length.
Attach to Main Body: On your main fabric body piece (right side up), determine the placement for your handles. Usually, they are centered vertically and spaced about 4-6 inches (10-15 cm) apart on the main body section (not on the curved flaps). Pin the ends of the webbing straps in place. Stitch them securely within the seam allowance (e.g., 1/4 inch from the raw edge) to hold them temporarily.

Step 4: Install the Zipper
Prepare Zipper Edges: Take your main fabric body piece. Along the two long, curved "flap" edges, fold under the raw edge by 1/4 inch (0.6 cm) and press. Fold under again by another 1/4 inch (0.6 cm) and press.
Attach Zipper: Place your zipper face down along one of these prepared folded edges (right side of fabric). Align the zipper tape edge with the folded fabric edge. Pin securely.
Stitch: Using your sewing machine's zipper foot, stitch the zipper in place.
Repeat: Repeat for the other side of the zipper, attaching it to the opposing folded edge of the main body piece. The zipper should now connect the two flaps, creating the top opening.
Topstitch: Topstitch on either side of the zipper, parallel to the zipper teeth, for a clean and professional finish.
Step 5: Assemble the Outer Bag
Sew Short Ends of Main Body: Fold your main fabric body piece so that the short ends meet, right sides together. Pin and stitch this seam with a 1/2 inch (1.25 cm) seam allowance. This forms a fabric "tube" with the zipper running along the top. Press seam open.
Attach Side Panels:
Divide the circumference of your main body opening (where the side panels will attach) into quarters and mark. Do the same for your circular side panels.
Align these quarter marks, placing one side panel (right side out) into the corresponding opening of the main body piece (which is still inside out).
Carefully pin the entire circumference of the side panel to the main body, easing the fabric as needed. Use plenty of pins or clips.
Stitch this seam with a 1/2 inch (1.25 cm) seam allowance, going slowly around the curve.
Tip: Clip the seam allowances of the curves after stitching to help them lay flat. You can also finish these raw edges with a zigzag stitch or serger.
Repeat for the other side panel.
Turn & Check: Turn your outer bag right side out. Give it a good press and admire its shape!

Step 6: Assemble the Lining
Repeat Steps 3, 4, and 5 for your lining fabric, except:
Do not attach a zipper to the lining.
When sewing the short ends of the main lining body piece (Step 5.1), leave a 4-5 inch (10-12.5 cm) opening in the middle of the seam. This will be used for turning the bag right side out later.
Do not attach handles to the lining.
Step 7: Combine Outer Bag and Lining
Insert Lining: Turn your outer bag right side out. Keep your lining bag inside out.
Nest Bags: Carefully insert the outer bag into the lining bag, so their right sides are facing each other.
Align & Pin: Align the top raw edges of the outer bag's zipper opening with the top raw edges of the lining bag's opening. Pin all around the perimeter.
Stitch: Stitch around this entire top opening with a 1/2 inch (1.25 cm) seam allowance.
Turn Right Side Out: Reach into the opening you left in the lining's bottom seam (Step 6.1) and pull the entire bag right side out through this hole.
Close Lining Opening: Hand stitch or machine stitch the opening in the lining's bottom seam closed.
Push Lining In: Gently push the lining into the outer bag. Press the top edge of the bag, ensuring the lining sits neatly inside.
Your Fantastic Custom Duffle Bag!
You've done it! You've sewn a beautiful, unique, and functional duffle bag. This project combines practical skills with creative design, resulting in a bag you'll be proud to carry.
Share your amazing duffle bag creations with us in the comments or on social media! Happy sewing!

No comments:
Post a Comment